An email sequence is a series of messages that are automatically sent out after a “trigger” is met.
Here are the most common sequences used in email marketing:
- Welcome email sequence – sent out after the order is completed
- Discount email sequence – for customers with cancelled orders
- Renewal discount sequence – for repeat customers who haven’t re-ordered in 6 months
Important Note:
You must authorize Blue Odin to send emails on your organization’s behalf.
Here’s our guide on how to add Blue Odin to your domain’s TXT SPF record.
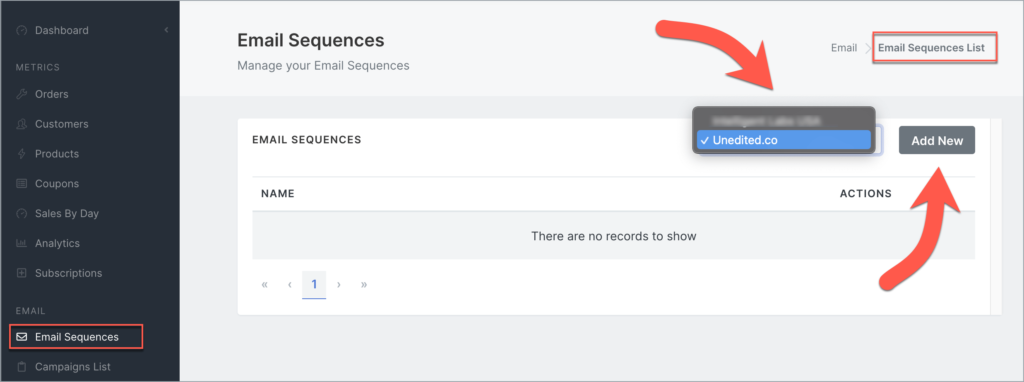
How to add a new email sequence in Blue Odin?
To add a new email sequence, go to Email > Email Sequences.
The default view is the Email Sequences List.
Select the WooCommerce Site in the site selector and click on the Add New button.
You will then be directed to the next page, the Email Sequences Edit page.
There are 3 sections in the Email Sequences Edit page.
Section 1: Add Sequence Information
Section 2: Applicable Orders
Section 3: Add Email
Section 1: Add Sequence Information
In the Add Sequence Information section, enter basic details for your sequence:

Here’s what the fields in the screenshot above mean:
Sequence name
Give a unique and descriptive name. This will come in handy when you’ve got a lot of sequences set up!
Start sequence when
This is what triggers the email sequence to start.
You can choose to send the sequence while the order’s still processing, or when it’s completed, refunded, or cancelled.
Customer audience
This is the Customer Segment you’d like to use for the email sequence.
Note: If you haven’t created a Customer Segment yet, check out this guide on How To Add Customer Segments in Blue Odin.
Products
Select the products you’d like to target for the sequence (don’t leave blank)
Click Save and Continue to proceed to the next section.
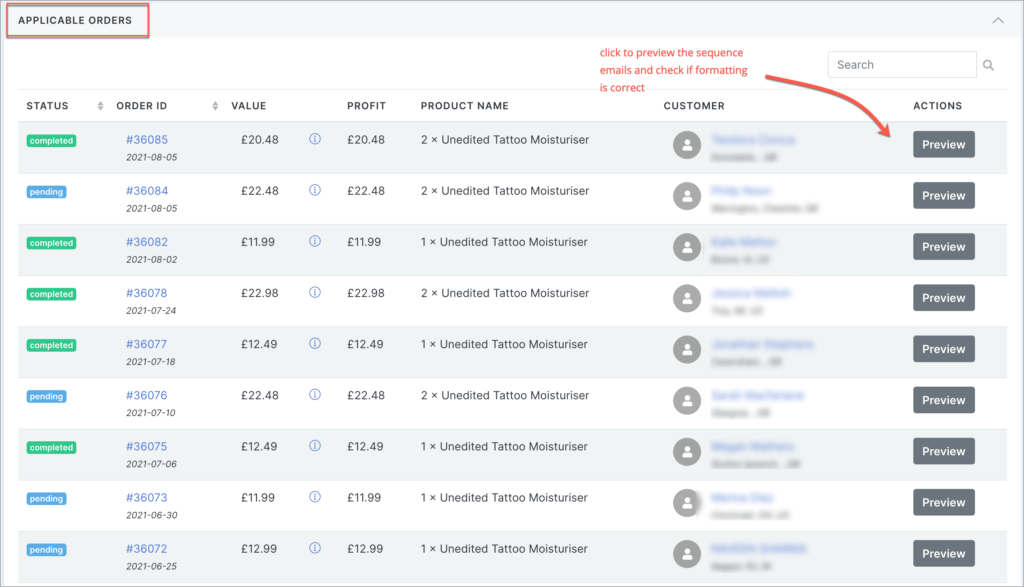
Section 2: Applicable Orders
These are the orders that match your selected trigger, audience, and product.
If there are no Applicable Orders that match your sequence requirements, you will see this message:
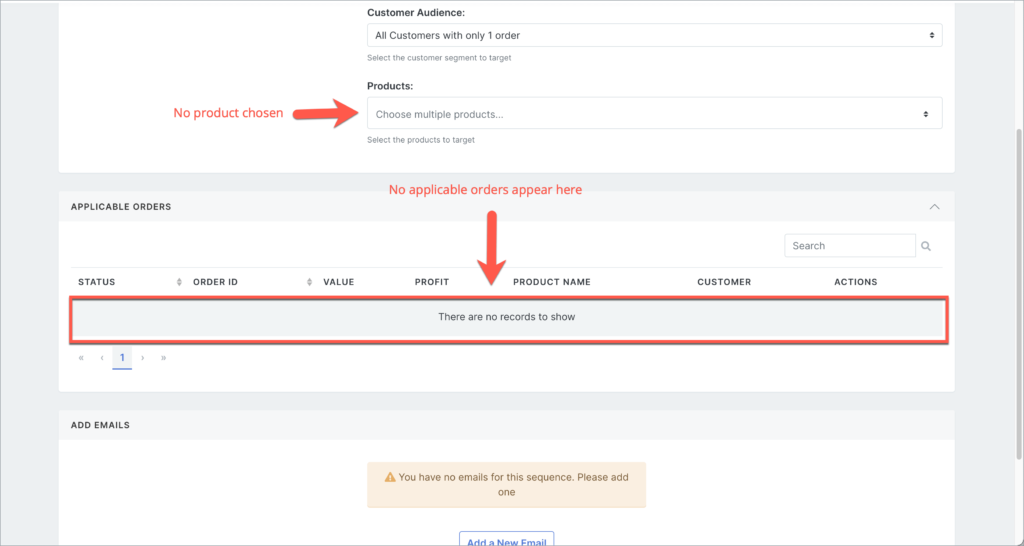
If there are no Applicable Orders, you need to go back to the previous section (Add Sequence Information) and make the necessary adjustments to your sequence requirements.
Section 3: Add Emails
Now it’s time to add emails to your sequence!
In the Add Emails section, click on Add a New Email:

The Email Settings page will pop up:
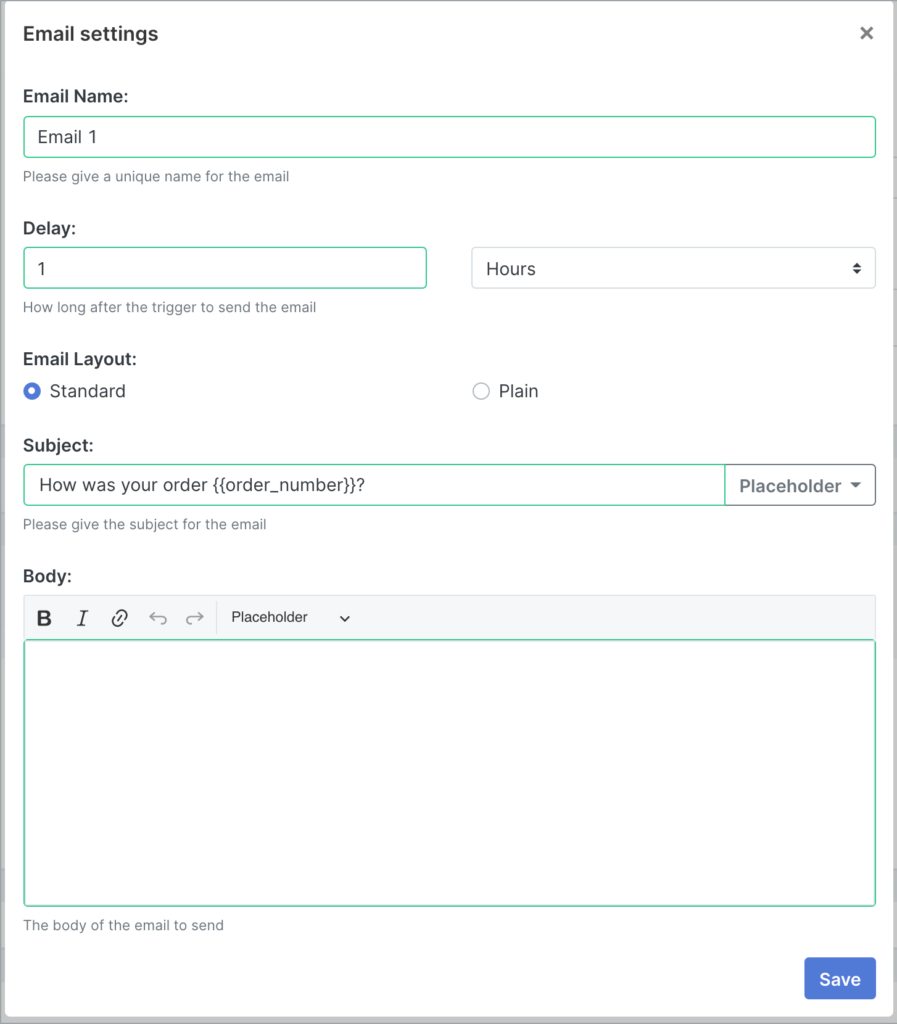
You can edit the following details in the Email Settings page:
Email name
Give your email a descriptive name
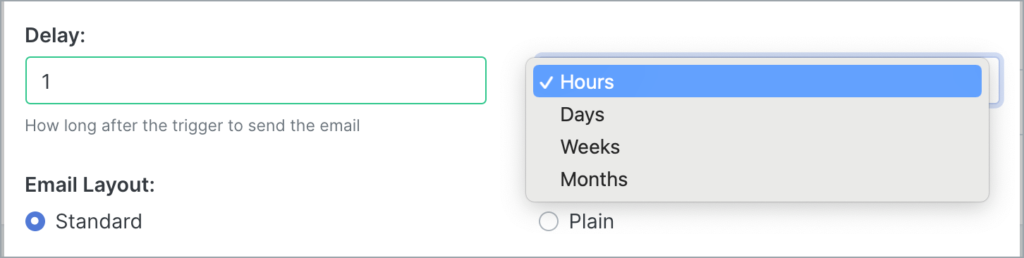
Delay
How long after the trigger to send the email. You can choose between Hours, Days, Weeks, and Months
Email layout
Choose between Standard and Plain
Subject
Type your email subject line (you can also use placeholders here)
Body of the email
Your email’s main message (you can format the text and add placeholders, too)
Click on Save to save your changes.
The Email Sequence Flow
Email 1 will now appear in the Email Sequence flow, like so:
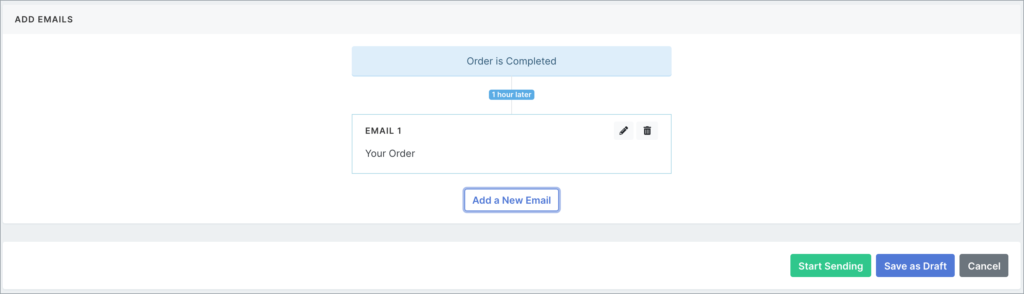
You can add as many emails as you like to your Email Sequence.
Here’s an example 3-email sequence:
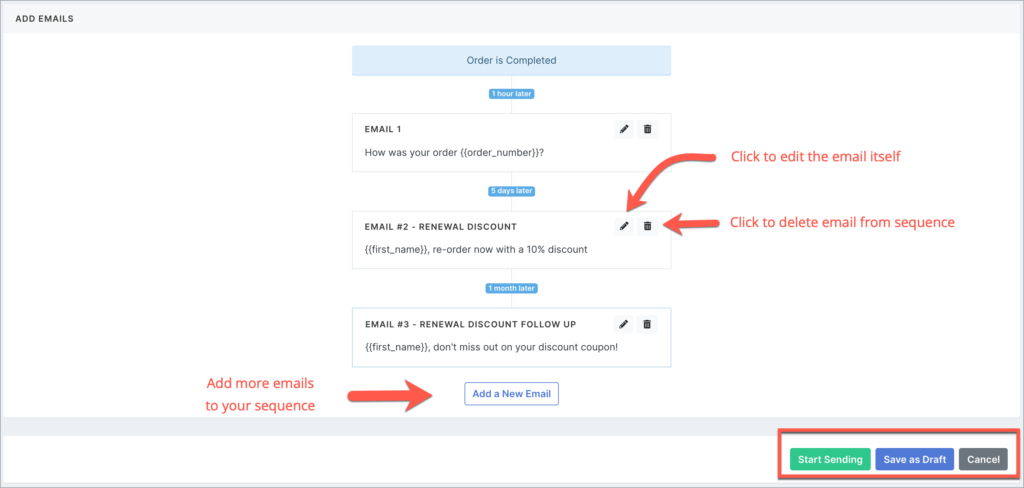
Click Start Sending if you’re happy with your sequence and want to set it in motion!
Click Save as Draft if you’re not yet ready to send out your sequence.
Hit Cancel if you’d like to undo all the changes you’ve made.
What are the email placeholders available in Blue Odin?
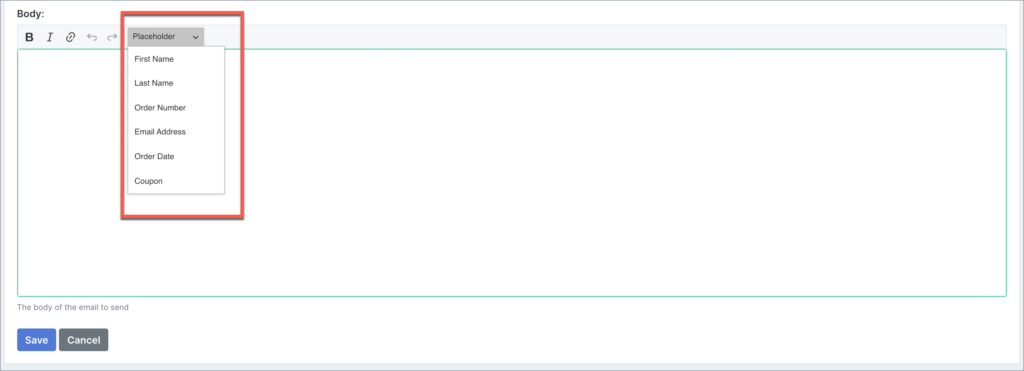
You can choose from 6 different placeholders:
- First name
- Last name
- Order Number
- Email Address
- Order Date
- Coupon
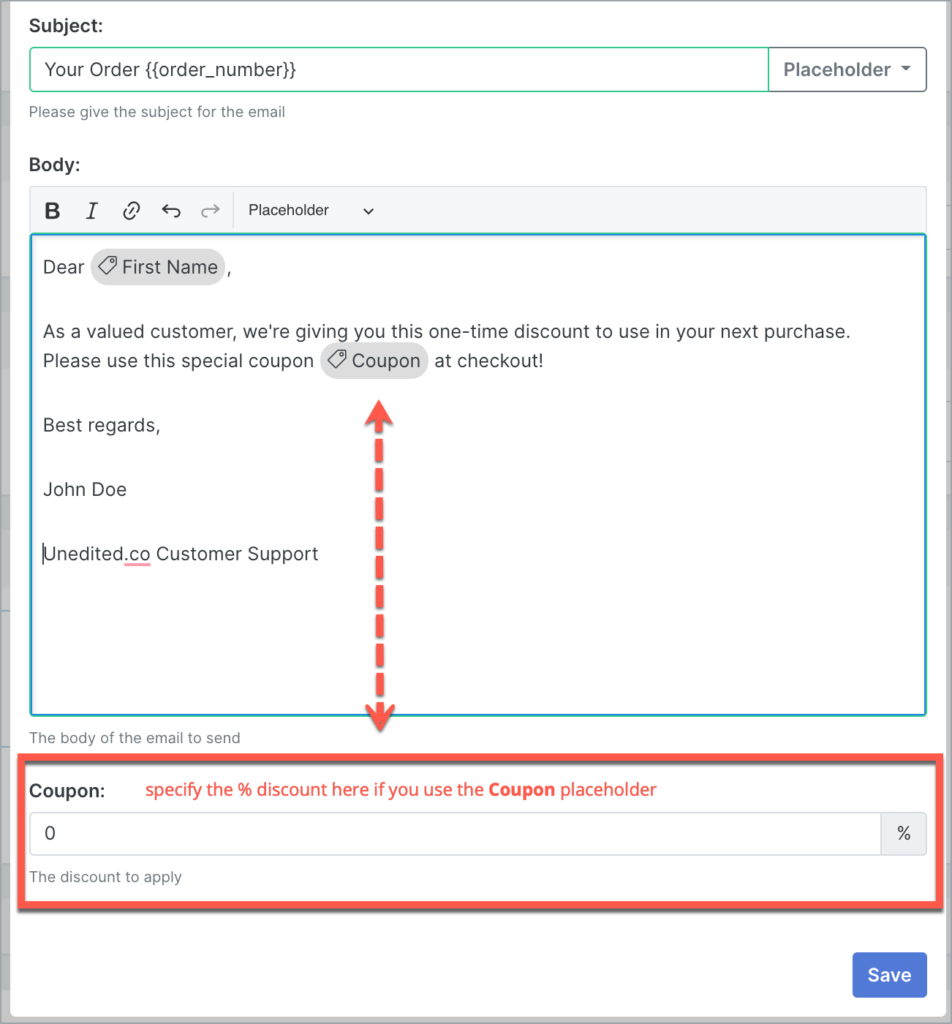
The value for the first 5 placeholders is predefined in WooCommerce.
For the Coupon placeholder, however, you will need to specify the % discount to apply.
Here’s what it looks like:
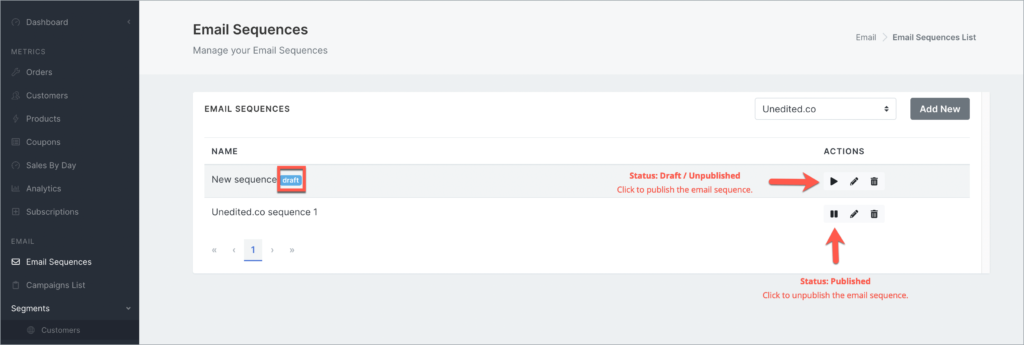
How to publish or set the email sequence in action?
There are two ways to publish the Email Sequence:
Option 1.
At the bottom of the Edit Sequence page, click on the green Start Sending button.

Option 2.
In the main Email Sequences page, look for the sequence you’d like to publish (this is why it’s important to have descriptive names).
In the Actions column, click the Play button to publish the sequence.